DigiLab One Documentation
This is the getting started guide for the Parleii DigiLab One.
Read Installing CH340 Driver to make sure your computer is setup to be used with DigiLab One.
Hardware Diagram
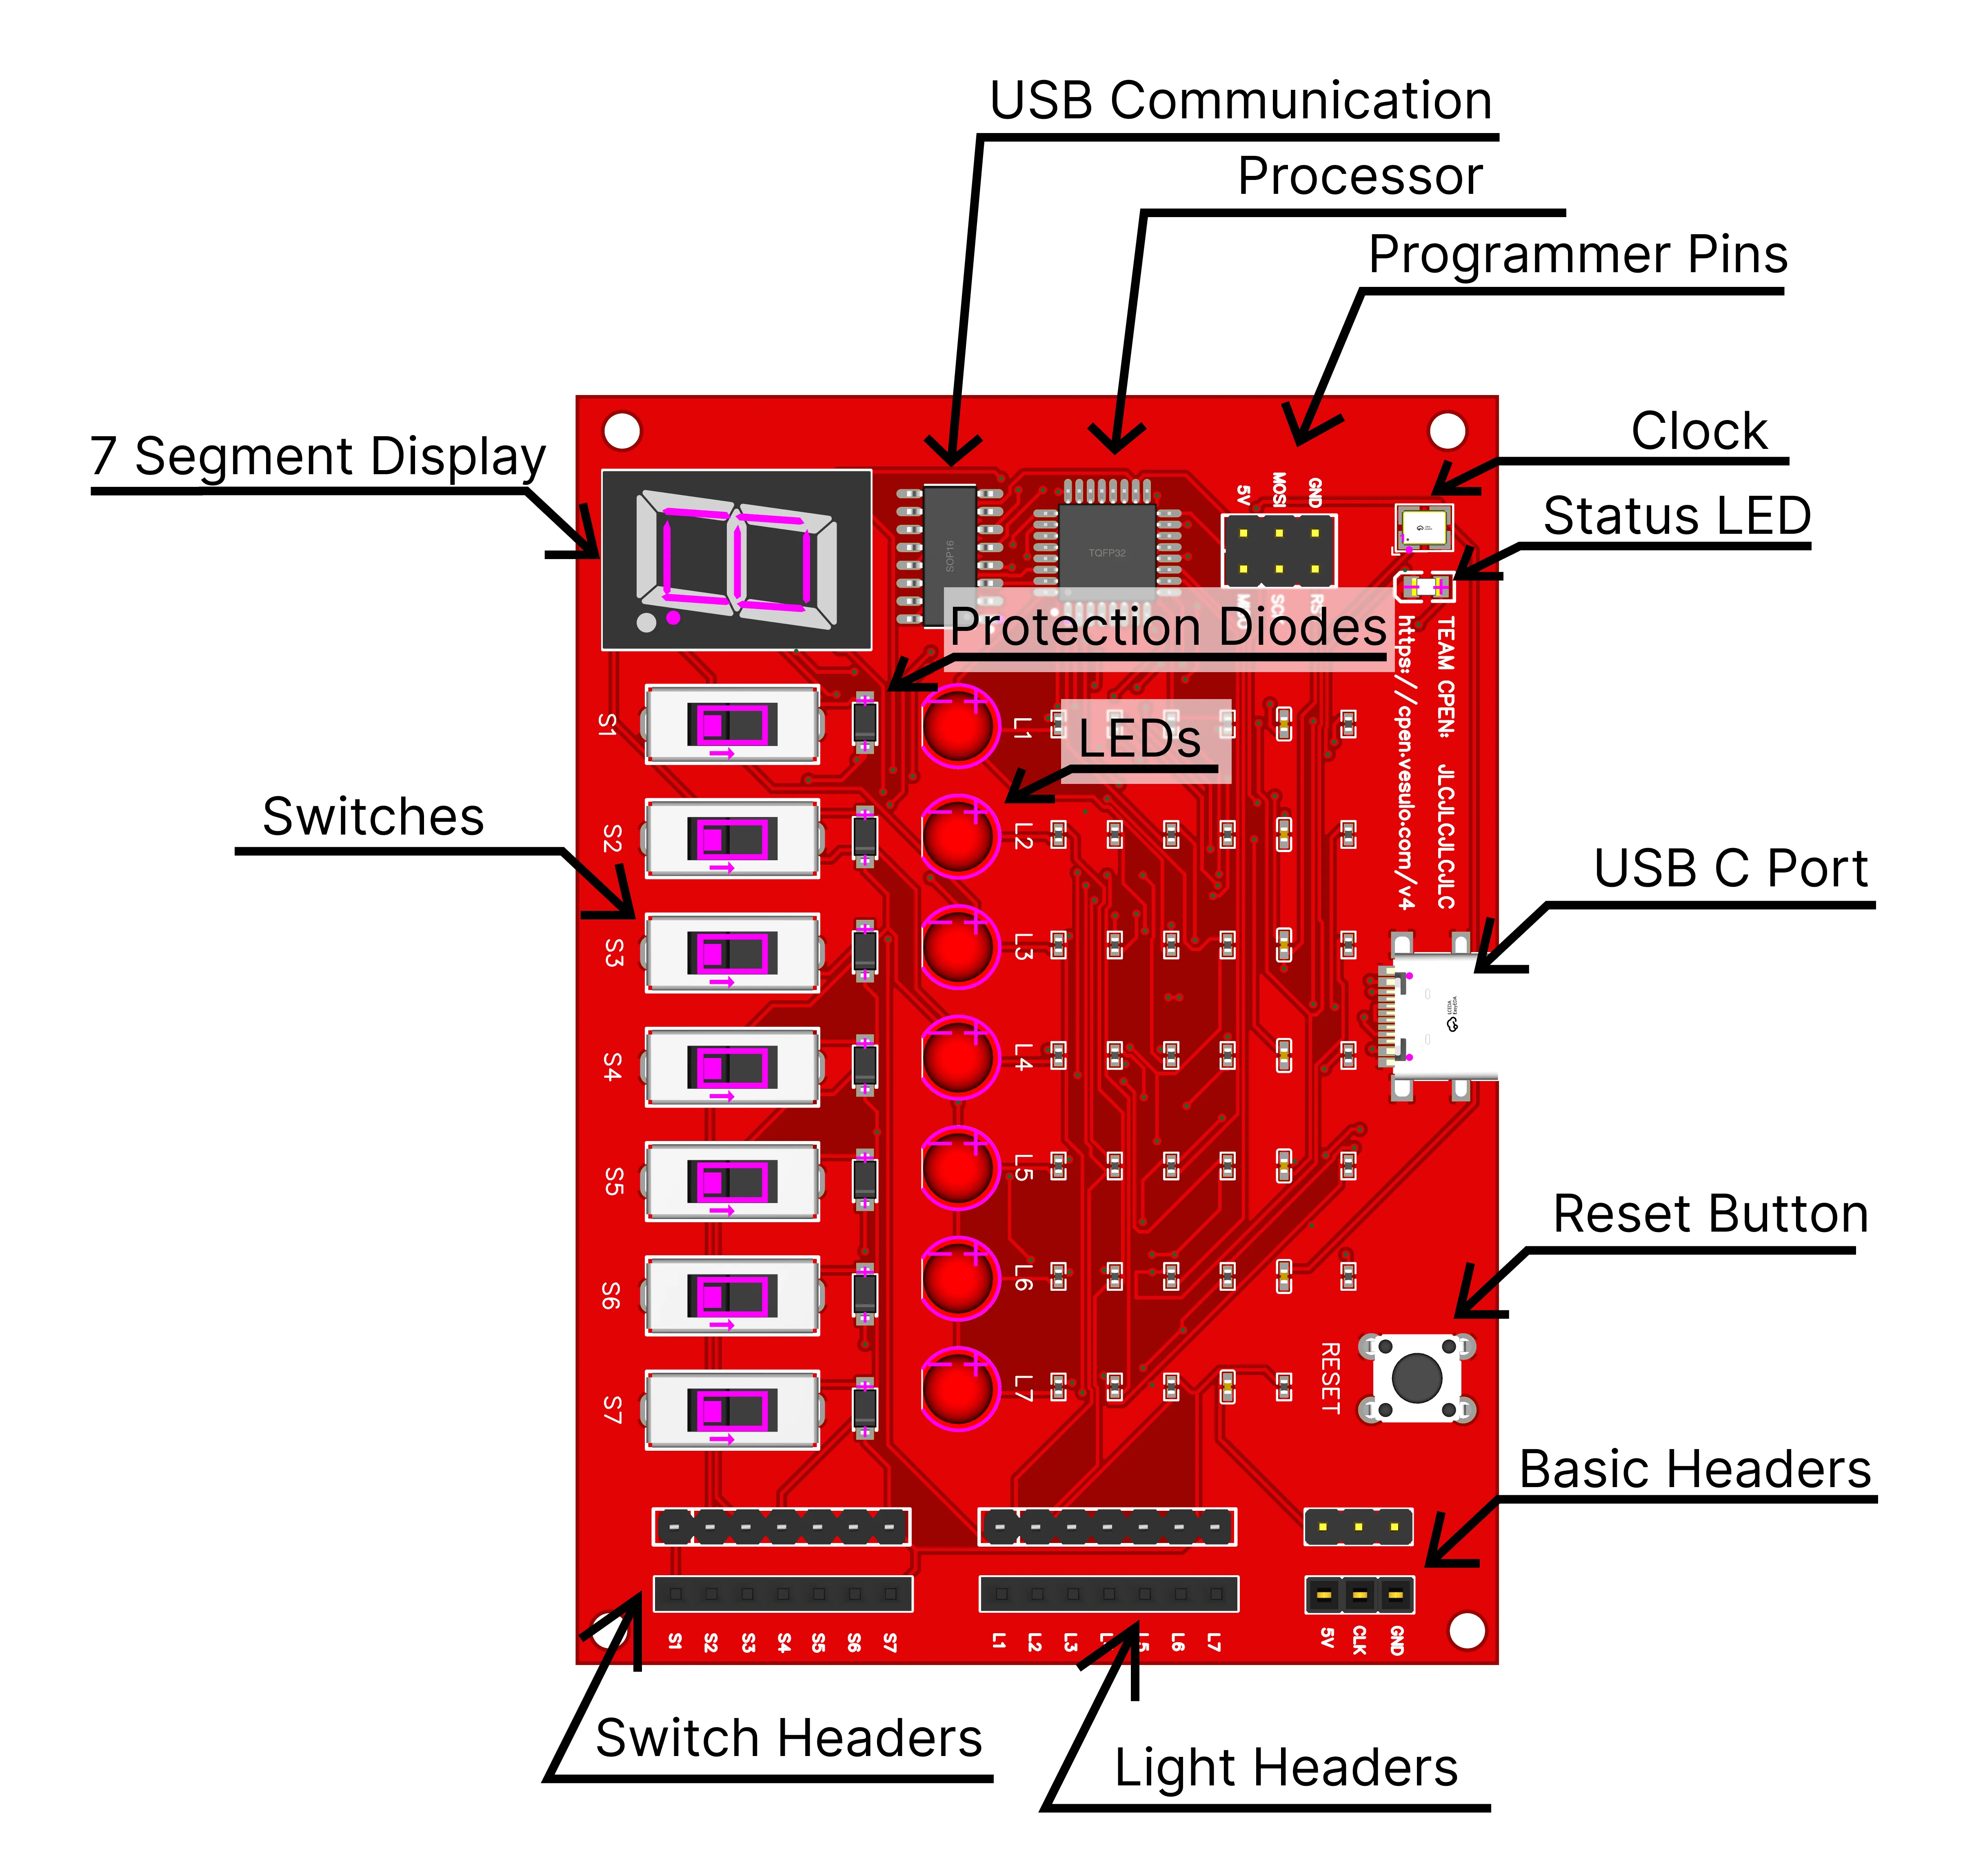
As shown in the diagram, the DigiLab One has the following components:
- Microcontroller: ATMEGA328P
- USB to Serial Converter: CH340
- Input Headers (Lights): 7 Male and 7 Female
- Output Headers (Switches): 7 Male and 7 Female
- Adjustable Clock
- 5V Power
- Ground Rail
Getting Started
The hardware is easy to get started with. Just plug a USB C cable to the device and plug the other end to your computer. The device will be recognized as a serial port.
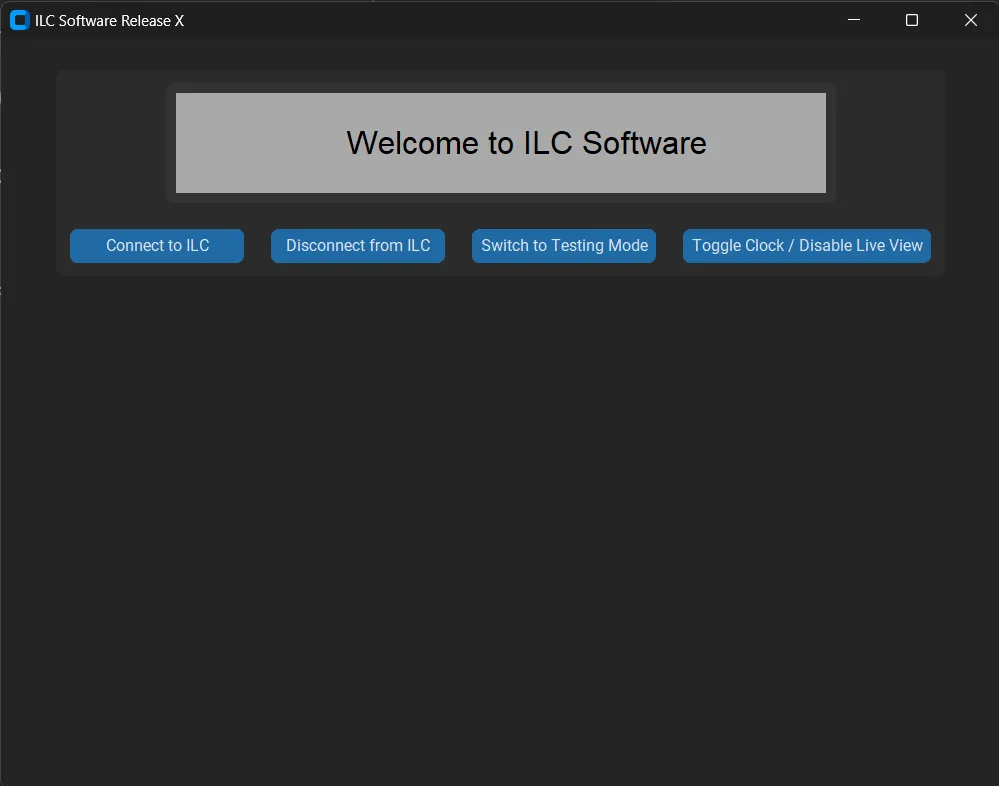
Installing Software
The software is only available for Windows. Download the software by clicking on this link DigiLab One Software. Install the software and open it.
Connecting to the Device
The software will automatically detect the device and connect to it when clicking the connect button. If it doesn’t, make sure the device is connected to the computer and the drivers are installed.
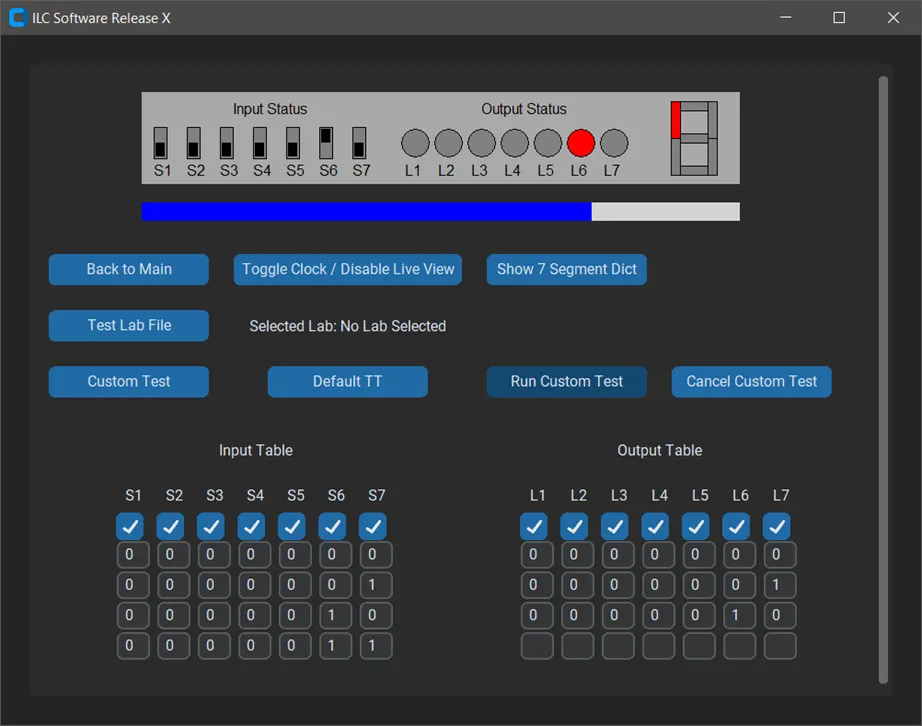
Live Status Update
The software will show the status of the device in real-time. The status includes the status of the lights, 7-segment, and the status of the switches.

Testing Logic Circuits
After clicking on Switch to Test Mode, the software will allow you to test the device. You can enter the input part of a truth table, and the output will be filled out in real time. You can also enter a test lab file given by the professor to verify your circuit against the requirements.
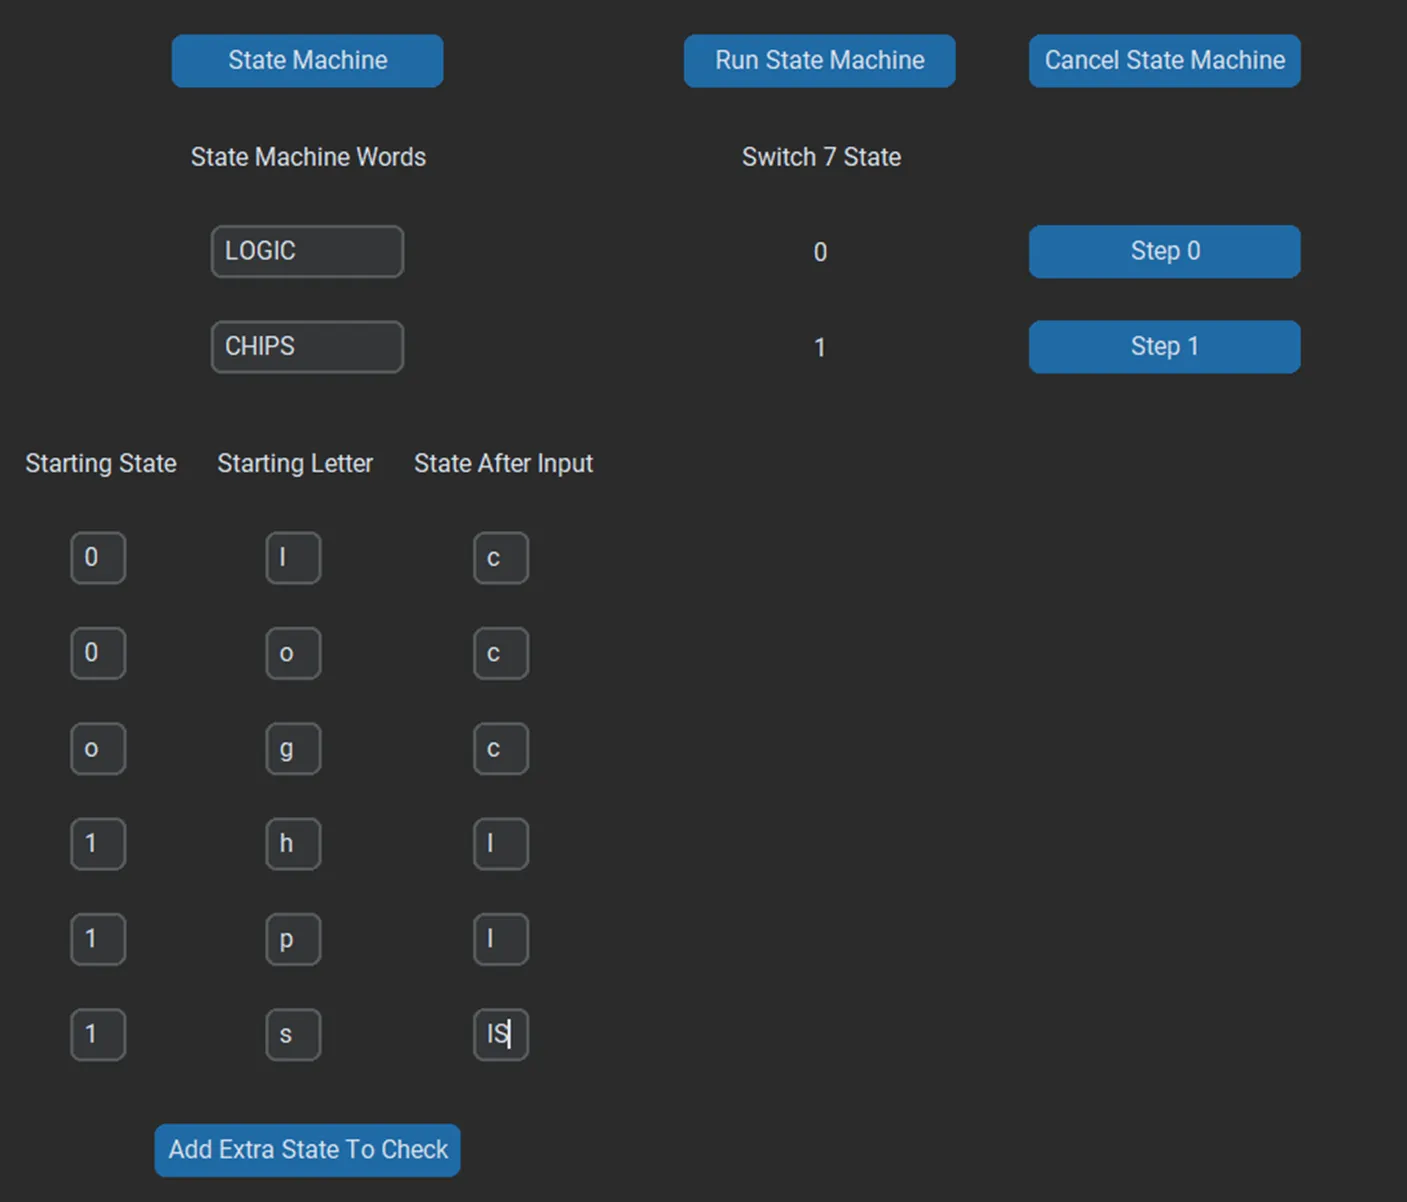
Testing State Machine
After clicking on Switch to State Machine Mode, the software will allow you to test the device. You can enter the words to be selected in the state machine (ASCII coding found in the software) and additional edge case checks with the number being which state the first letter can be found in. This will allow you to test the state machine against the requirements.